Before someone can clock in with vTime, an admin adds them as an employee and sends them an invitation by text message. The text contains your company's vTime link; they open it on their phone and sign in with a code.
Who can do this: admins only.
TABLE OF CONTENTS
- Where employees are listed
- Adding one employee
- Sending or scheduling an invite
- Adding many employees from a spreadsheet
- Viewing and changing an employee
- Removing vTime access
Where employees are listed
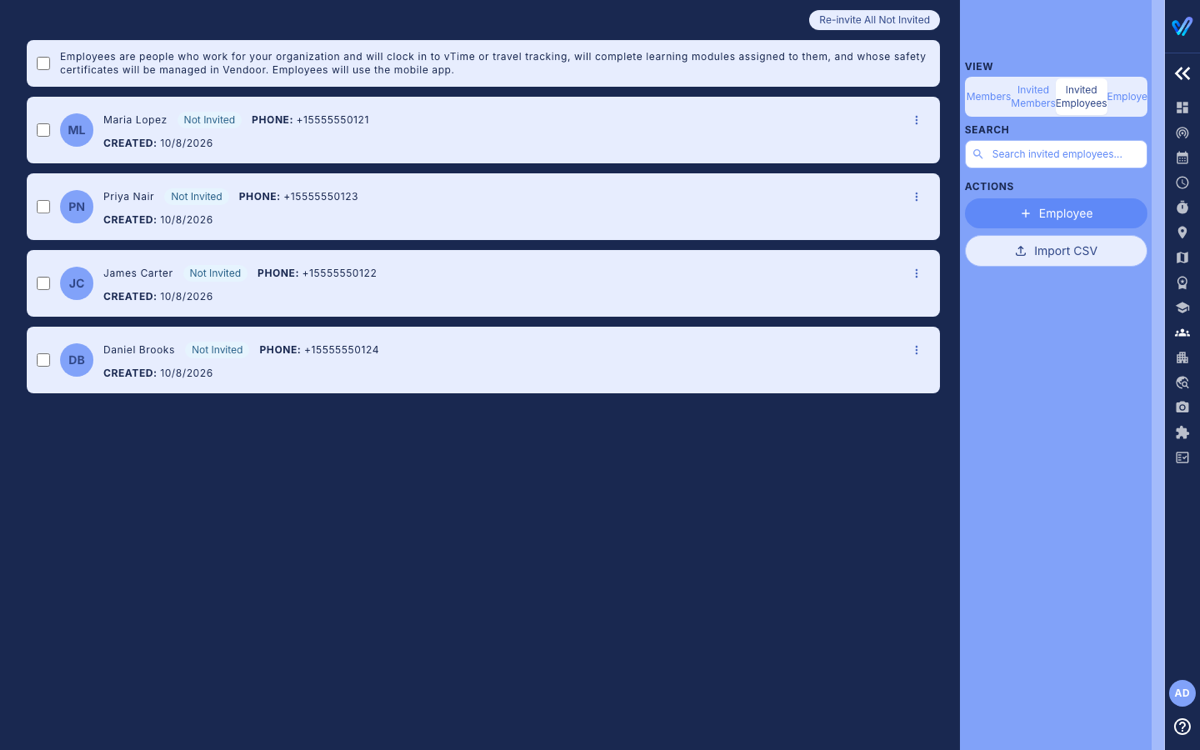
Open Team from the menu on the right. Under View:
- Invited Employees: people you have added who have not signed in to vTime yet. Each shows Not Invited, Scheduled or Invited.
- Employees: people who have signed in to vTime at least once (Verified).
Adding one employee
- In Team, choose the Employees view and click + Employee. (Use the Employees view: the button does not open the form from the Invited Employees view.)
- Enter the First Name, Last Name and the employee's mobile Phone Number (10 digits). Email, Company, Role/Title and Employee ID # are optional. The Employee ID appears in exports, so use your payroll or badge number.
- Leave Send SMS invite ticked to text the invitation now, or untick it to add the person without inviting them yet.
- Click Create Employee.
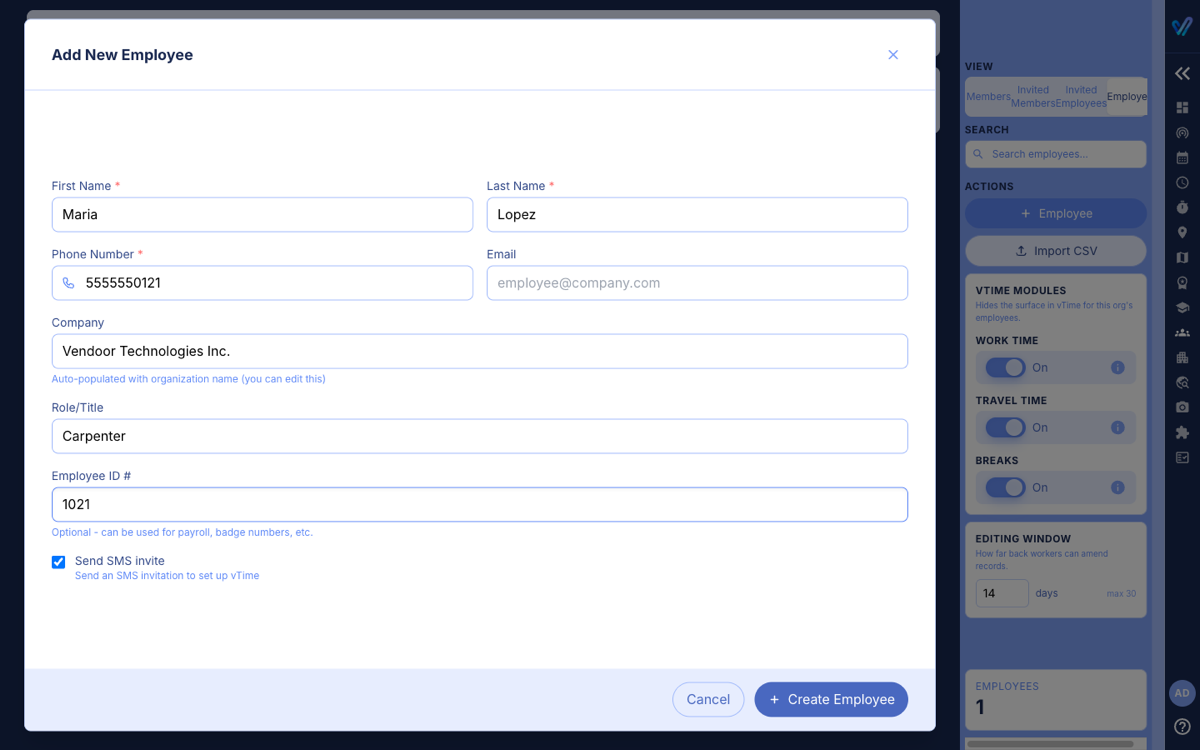
- The phone number matters. vTime invitations go by text message only, and the mobile number is what the employee signs in with. If you enter only an email address, the invitation cannot be sent, even though the box may say "email invite".
- The confirmation window tells you whether the text was sent. If it says it failed, check the number and use Send Invite (below).
- If the person is already a member of your team, vTime adds the employee role to their existing account instead of creating a second one.
- An employee who was not invited cannot sign in to vTime yet; they see "Invitation Not Found". Invite them when they are ready to start.
Sending or scheduling an invite
On the Invited Employees view, click the ⋮ on the right of a person:
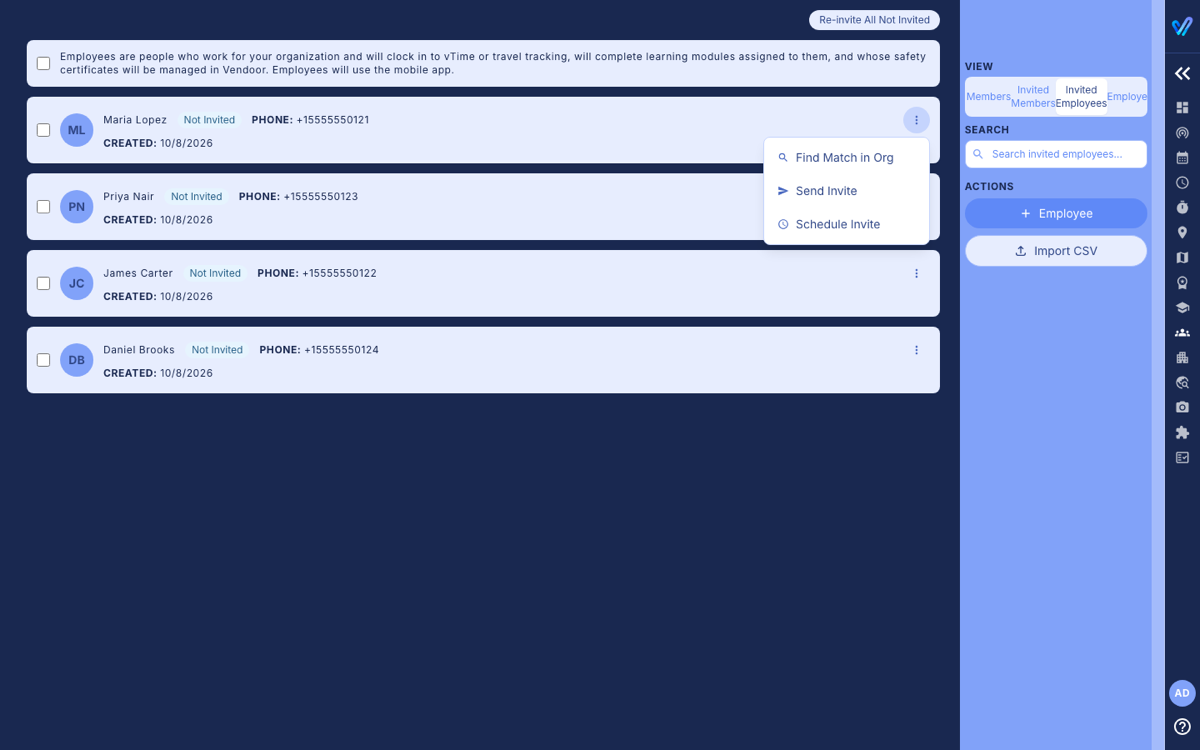
- Send Invite: texts the vTime link now.
- Schedule Invite: picks a date and time to send it, for example the morning of their first day.
- Resend Invite (already invited) and Revoke Invite (cancel an invitation).
- Find Match in Org: check whether this person already exists under another record.
To invite several people at once, tick them and use Bulk Send Invite or Bulk Schedule, or click Re-invite All Not Invited at the top of the list.
Once invited, the employee follows Using vTime For The First Time (iPhone) or (Android). If they get stuck, see Trouble Signing In To vTime.
Adding many employees from a spreadsheet
- In Team, click Import CSV.
- Prepare a CSV file with this first line exactly: First Name,Last Name,Phone Number,Email,Company,Role/Title,Employee ID,Setup Time Clock
- Click Choose CSV File. vTime shows a preview with each row marked Valid or with the problem, such as a missing name or a 10-digit phone error.
- Click Import. Only valid rows are added; the last screen lists any that failed and why.
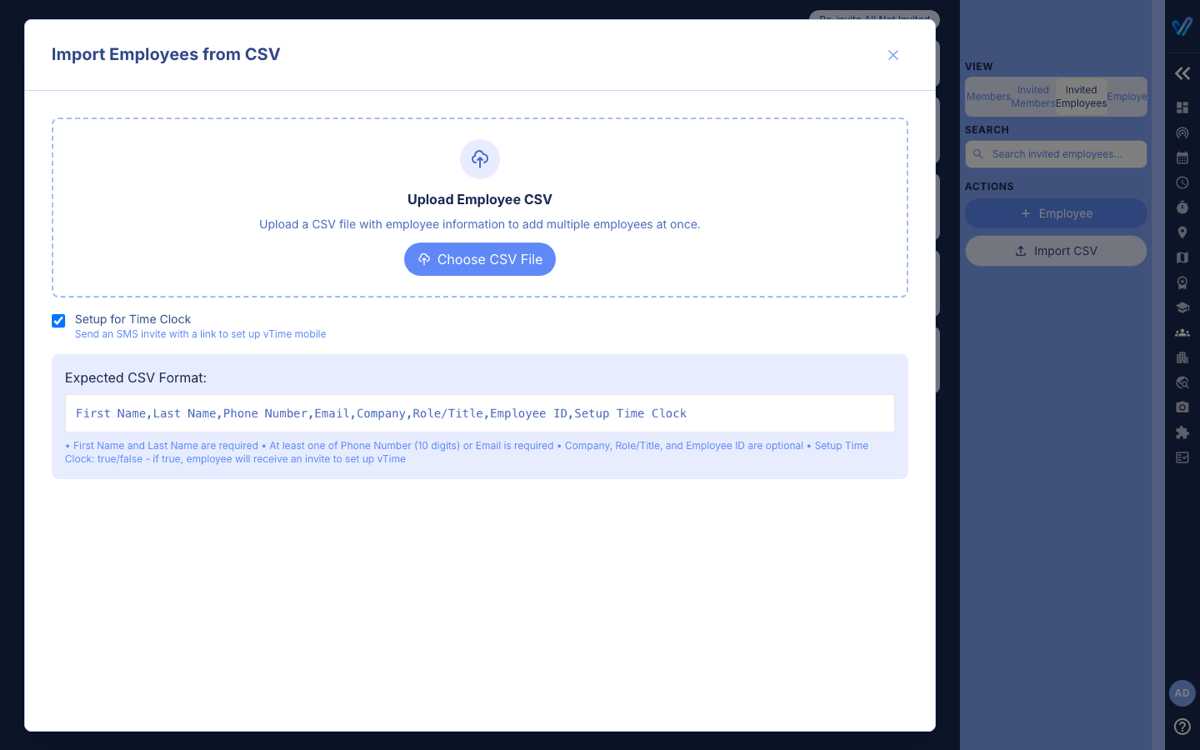
- Each row needs a first and last name and a phone number or email.
- Setup Time Clock: true, yes, 1 or blank sends that person a text invitation; false adds them without one. Untick Setup for Time Clock on the import screen to send no invitations at all.
- People whose phone number is already in your company are skipped and listed as failed.
Viewing and changing an employee
Click a person to see their details: phone, email, home address, invitation status and their shifts. The details are view-only: to change an employee's phone number or Employee ID, contact Vendoor support.
Removing vTime access
On the Employees view, click ⋮ and choose Revoke vTime Access. The employee is signed out of vTime and can no longer clock in or out. After that they no longer appear on either view; to give them access again, contact Vendoor support.
Was this article helpful?
That’s Great!
Thank you for your feedback
Sorry! We couldn't be helpful
Thank you for your feedback
Feedback sent
We appreciate your effort and will try to fix the article